Flight 8. Jan 3, 2016.
Woohoo, fuel vent leak fixed.
Preflight:
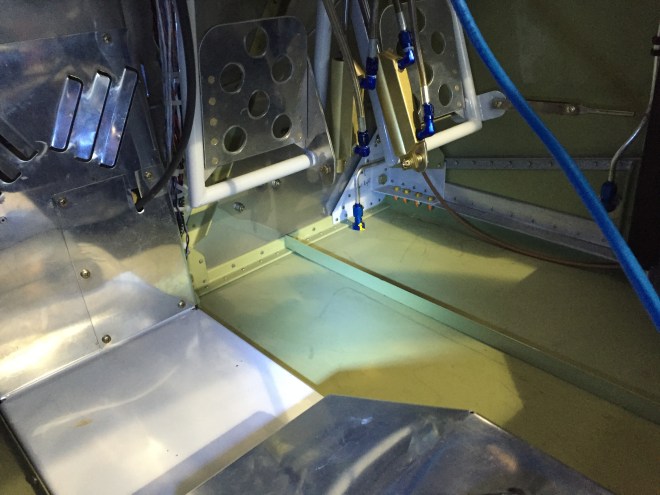
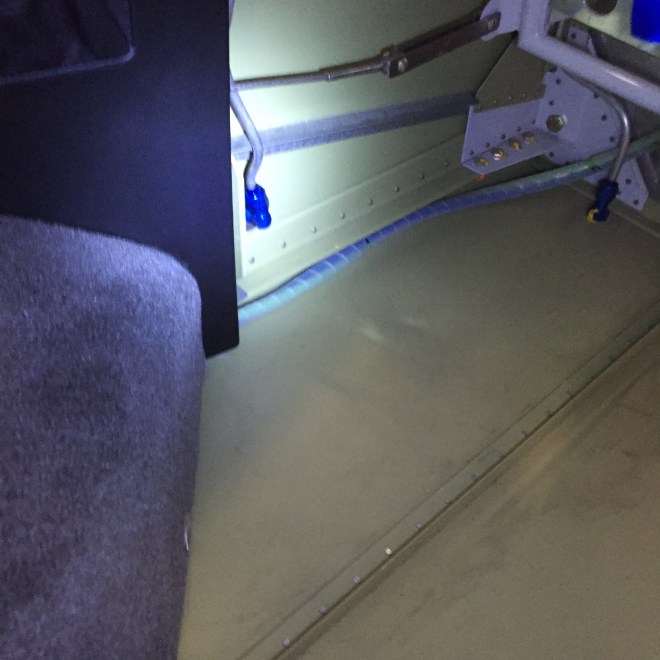
Added 1/2 quart of oil. Also found the source of my fuel smell. Last night when the FBO filled the tanks, they filled them so full that fuel was displaced when I reinserted the fuel caps (thats full!). However, this also caused more fuel than normal to burp out the fuel vents overnight. When doing the pre-flight today, I noticed fuel staining on the exterior fuselage side skin, below the root/leading edge of the wing on the right side. This coincided with the area where the fuel vent entered the fuselage. I pulled the wing root fairing expecting to find fuel staining inside the wing root area on the fuselage skin above where I saw the stains. However, there were no leaks on the outside of the fuse in the wing root area; (see clean picture above) it seemed to be coming from the fuselage skin seam between the side skin and the floor skin.
This led me to climb into the cabin and stick my head up under the panel with a flashlight and inspect the fuel vent on the inboard side of the fuse wall. Lo and behold there was some evidence of weeping fuel from the flare fitting where the 90 degree elbow attaches to the fuel vent tube. There are 4 of these vent tube connections inside the fuselage, and it turns out I hadn’t fully tightened any of the 4! This is probably the biggest mistake I have found in the build to date, and is a big blow to confidence to find 4 vent connections only finger tight (makes you wonder where else you missed something no matter how careful you try to be).
I tightened the one that was leaking at the wing root on the right side and its corresponding brother on the left side (connection was loose, and only minor evidence of fuel staining there). I also attempted to tighten the other two connections near the firewall where they exit the floor to the fuel vents. Harry helped me by holding a 11/16 wrench on the outside of the fuel vents while I tightened the nuts on the inside. Once the bulkhead fitting was tight, I was then able to tighten the flare fitting on each side.
Flight 8:
I filed for a 1 hour flight out of HEF (instead of my normal 1:30) just to check if the fuel smell issue was resolved. I’m happy to report that the issue seems to be cleared up. I’ll watch this as we go forward, but I’m 90% sure the issue is fixed.
During the flight I also managed some 65% and 75% cruise at 7,500. And also some slow flight at 70 KIAS and 80 KIAS flaps up. I did lots of left and right turns with 30 and 45 degrees bank.
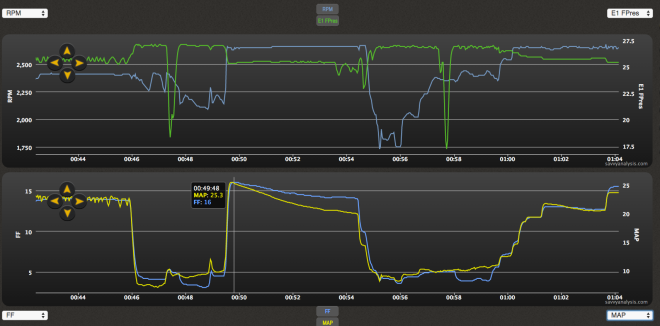
Flight Data
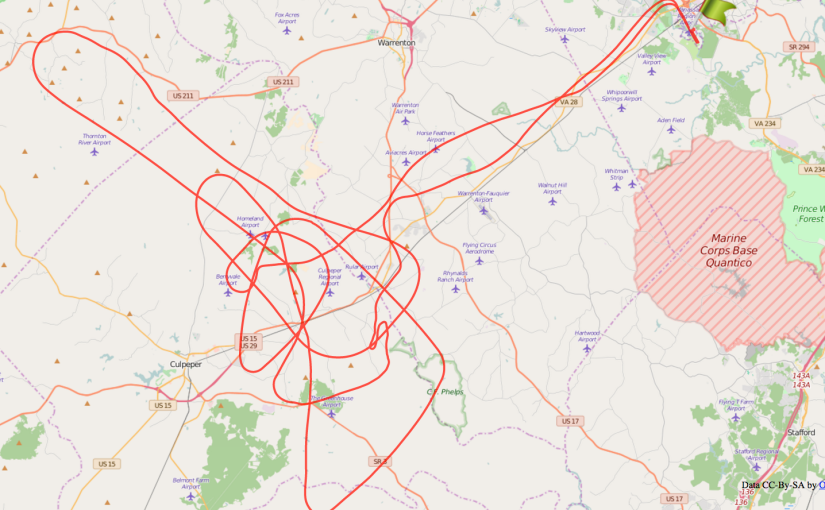
Flight Map
1.5 hours engine, 1.5 hours electrical, 11.1/12.5 cumulative.
Post flight:
14 gallons dipstick on right tank. 10 gallons remaining dipstick on left tank. Fuel truck added 5 gallons to the right tank, and 9.9 gallons to the left tank. Dipstick then measured 20 gallons on the left tank, and 20.5 gallons on the right tank. I know these don’t add up perfectly, but such is the precision of dipsticking with 2 gallon intervals.
Also noticed during this flight I forgot to reset the fuel totalizer so the following measurement also includes the fuel burn from flight 7 (17.9 gallons). Fuel totalizer = 34.1 used, 25.8 remaining. Compensating for the 17.9 gallons from flight 7, leaves a totalizer measurement for this flight of: 34.1-17.9=16.2.
I forgot to download the flight data from the G3X so I will post that here later.
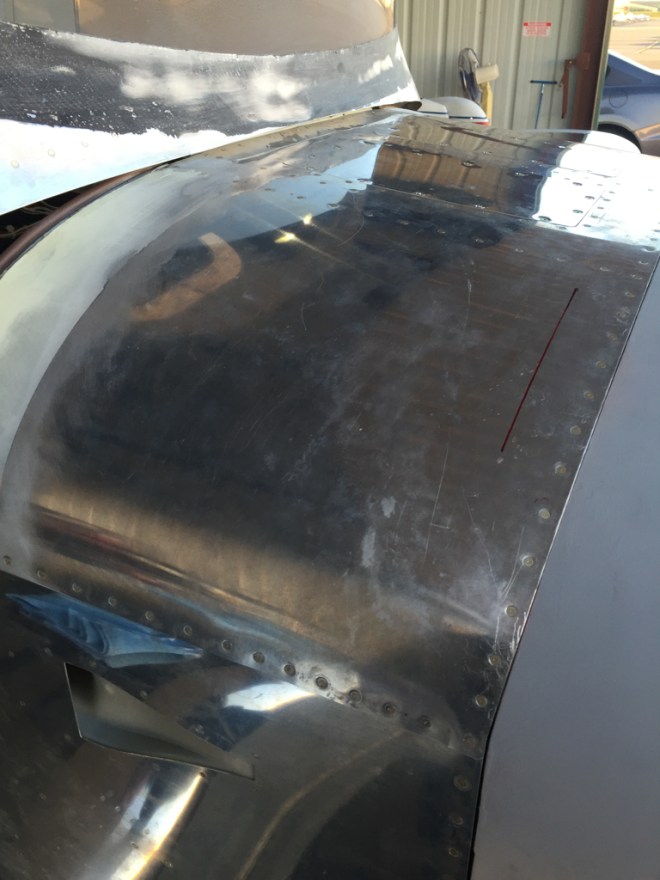
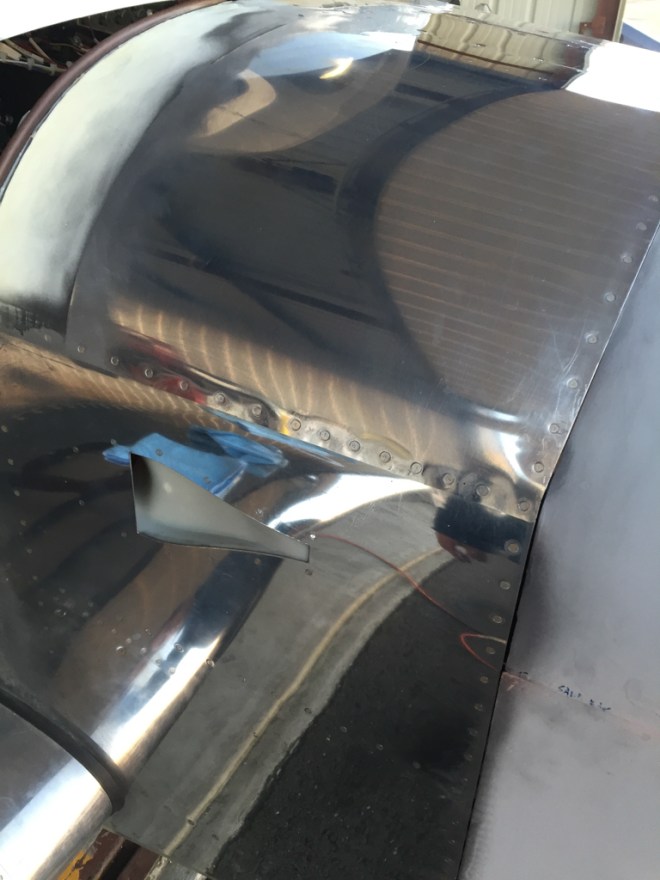
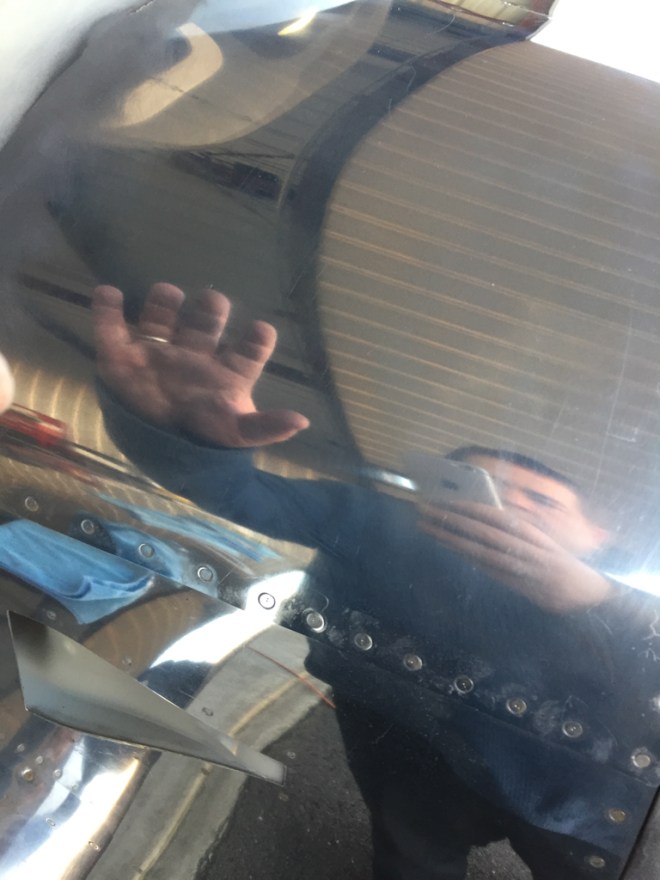
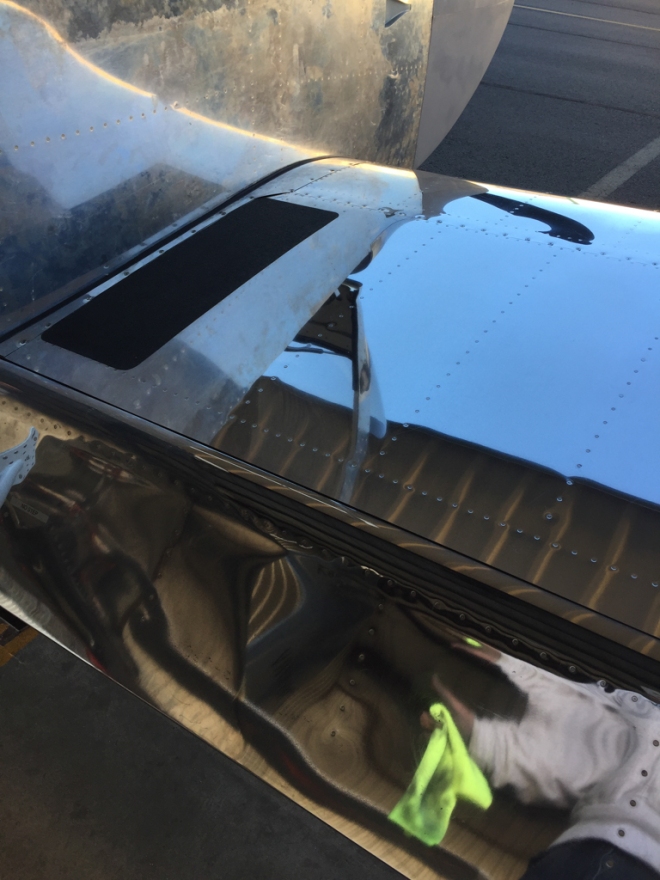
Oh, and I polished the top of the right wing the other day. This is what it looks like when the wing top is polished and the fuselage still looks crappy: